We process your personal information to measure and improve our sites and service, to assist our marketing campaigns and to provide personalized content and advertising. By clicking the button on the right, you can exercise your privacy rights. For more information see our privacy notice.
Privacy Policy

Foiling Secrets Revealed
May 23, 2019

Shhh, you guys... we want to reveal all of the secrets to foiling, but you have to promise to keep it on the down low. So... do you promise?

Just kidding! Please tell EVERYONE you know about these tips and tricks to eliminate any and all confusion when it comes to foiling! So let's get down to it, shall we?
We get inquiries all the time from foil users (and those who want to foil) asking us for the secret to get the PERFECT foil adhesion. So we decided to put this guide together for you all! We hope it will answer ALL if your foiling questions and help you achieve the best possible finished foil, every single time.
But first, what is foil?
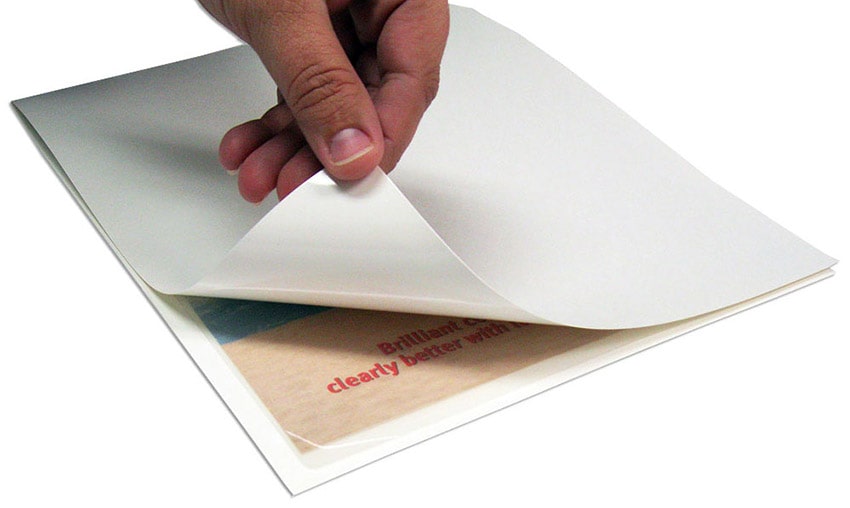
Our foils are not the standard "tin" foils you find in the kitchen. They are actually a specialty foiled material that is applied to paper with heat and toner. This process takes plain printed sheets of paper, and attaches a foil to the printing, creating a metallic, glittered, holographic, iridescent, pigment, or matte finish. This overlay of foil atop the ink design lets you create any number of beautiful finished pages. Some users use it to add a gold border to their business cards, to add some glitter to their company letter head, to add a bright white to a black cardstock, and so much more.
Thermal foil (also called toner foil) has a special adhesive on the back and a color or patterned design on the front. The adhesive on the back is not sticky to the touch as a traditional adhesive might be; instead, it is activated by heat, and will only stick to toner printer ink.
Ok, so now that you have a basic understanding of what foil actually is, we can dive into the purpose of this article...to reveal all of the foiling secrets!
Secret #1 - Use Toner Inks Only

Alright, so not really a secret, but this is the most important factor to guarantee proper foil transfer! Our foils are manufactured with a unique adhesive on the back that is activated by the combination of heat and touch with 'dry toner'. This means that wax-based inks, traditionally found in smaller, home-level printers, will not work. The difference is in the ingredients of the inks as well as the printing process of the machines, so it is important to ensure you are using the proper printing equipment before you try to foil. This will avoid foil frustrations and open the doors to all the possibilities.
So check your printer user manual for compatible cartridges to find out if your machine will work. If it wont, you can always find a local print shops that uses a toner printer or copier; they have the larger, more industrial equipment that almost always calls for dry toner. You can also learn more about the differences between ink and toner on this blog.
Secret #2 - Use A Quality Heat Source
Toner foils are thermal-reactive, so require heat to activate the adhesive and make it stick to the toner. But not all heat sources are created equal.
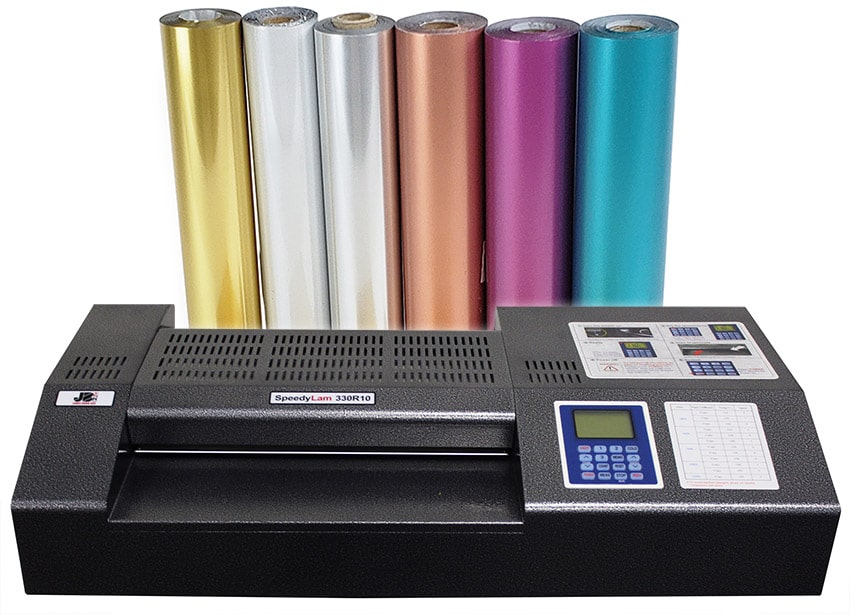
The most common heat used is from a foil laminator (or thermal pouch laminating machine). Some pouch laminators, however, do not reach the proper temperatures for the adhesive to actually activate, which leaves users frustrated with partial or spotty foils. To ensure this does not happen to you, make sure you are using a quality laminator with proper heat capabilities.
Most of our foils require a minimum of 300°. Note the word 'minimum'. The hotter your laminator is capable of getting, the better, because it allows more wiggle room for testing. And some foils, such as holographic (especially transparent) require a significant amount more. So the hotter your laminating machine can get, the better.
Smaller home-laminators often do not reach this temperature, so we do not recommend them. However, some of our customers who choose to use them simply run their foils through twice (without peel the foil off the design). This works well for many of them. Some even more create users use a household iron to foil; though this may take some finagling, it seems successful for many individuals. (Hint: Never use an iron directly on foil, and never run foil through machine without a protective pouch carrier.)
Another great heat source for foiling a quality product is with an official foil fusing machine. These machine are for high-volumes of foiling, such as those performed in print shops and artistic studios.
Secret #3 - Use an Adjustable Speed
Whether you have a machine that gets hot enough or not, an adjustable speed is another secret tip to ensure the best foil possible. It lets you slow down the run-speed, effectively applying more heat, or speed it up if your foil is adhering to paper outside of your printed design. This is one of the major benefits of speed adjustments on laminating machines.
Without adjustable speed on your foil laminator, you will have less control over the finished piece. If your foil is not adhering enough, you could potentially increase the heat, however, if your machine won't adjust for that either, than your only other choice is to run the carrier through the machine again, and hope that the second run-through makes it come out as you expected.
Secret #4 - Use Premium Foil Only

You can find "thermal foils" at many craft stores under a ton of different names...but they are expensive per square-inch, and are not to the same level of quality as the Therm-O-type brand foils. We're not just tooting our own horn here, users who have used Minc and other brands along side ours agree that ours are a much better quality and, although only available on longer rolls, much less expensive per square inch of foil. Better quality and better price? Why not! Here are just a few things customers keep telling us:
- "This foil works amazing, I rarely have issues with it not sticking to the toner. I will start transitioning all of them to Binding 101 as long as they keep being so easy to use (not sticky like Minc) and good quality (not like deco foil)" -Nikki
"This pink is sure to be a favorite with little girls. The price per roll of foil at binding101 is great. This is NOT the same foil you will find at the craft store. It does a much better job for toner laminating than you will get if you attempt to use the stuff from your local craft store....even with an industrial laminating machine...this is the stuff to get. The quality is perfect and the price is nice. Works beautifully. I had absolutely no problems with these foils and I will definitely be ordering more colors. The gold and silver are wonderful. Classic colors, sure to be useful. I had absolutely no problem using them. They even adhere to light areas of toner. Some of the colors did better with a thicker layer of toner, but silver and gold were great no matter what." - Tamara (GA, USA)
"I absolutely LOVED this foil!! It turned out so great! I wish that I could put pictures! I made sure the I knew which side of the foil was meant for the toner side and that helped. But I would recommend this for anyone who is looking to spruce up their papers :)" - Sarah
Other less-expensive foils work, however, they may not have the same adhesive saturation and, therefore, not the same ability to foil completely, without speckles. That is why, (although perhaps not officially a secret, since we can go back to the old saying "you get what you pay for") our Therm-O-Type foils have the best reviews, across the board.
Secret #5 - Use a Carrier AND Scratch Paper
What is a carrier, you may ask? A pouch carrier is a folded laminated cardstock tool that is used in order to temporarily encapsulate your foil and print throughout the heat process. This is an incredibly important thing to have on hand, and we recommend having several, because sometimes foils will stick to them. And that is where the scratch paper comes in... having thin pieces of scrap paper to place between the foil and our carrier is the easiest hack to ensure foil does not transfer onto the carrier, which means you can use them over and over again without any concern of foil from the 1st job transferring onto your next jobs.
Note: Carriers are only needed with the pouch laminator method, and are not required for foil fuser machines.
Secret #6 - Use Smooth, Uncoated Paper Only
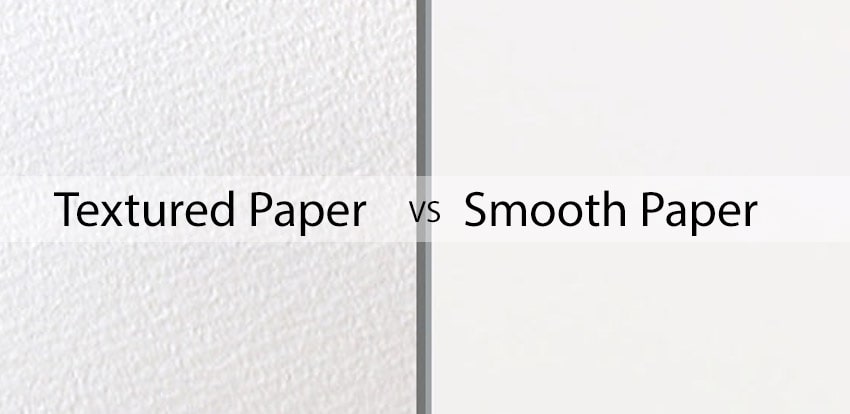
Have you been wondering what the best paper to use for foiling is? Smooth and uncoated paper stocks are going to be the best surface to accept the foil. As you can imagine, textured papers with rivets and bumps wouldn't allow for an even foil. The foil would stick to the mountains, but not the valleys; and it would be uneven and spotty. Coated paper (like glossy stocks) are often times too slick and will resist the foil, preventing any adhesion at all. That is why the best paper for foiling are uncoated and smooth paper sheets.
Have a secret to share? Email me at mallorym@buy101.com for a chance to be featured in our blog!
For more information or a quote, call us at
(866) 537-2244
or email
info@buy101.com


Hi! My name is Mallory and I have been in the industry since 2008. If you do the math, that is over 15 years. I have spent my time at Binding101 in many roles, including customer service, sales, e-commerce management, video production, and more! Because of this vast experience, I bring a truly expert touch to the content in our blog. widdling down complex topics to extract what our customers really want to know. As the Content and UX Manager, I act as a writer and editor for the majority of copy you will find here. When not at my computer, I love spending time binging stand-up comedy, baking, and cuddling up with my family and rescued cats and dogs...
Related Products
-

-
 Medium Satin Matte Gold Laminating Toner Foil #GLD-02 (Price per Roll)
Starting at: $57.74
![Mirage Holographic Foil Fusing Rolls [Transparent Underlay] Image 1](https://www.binding101.com/media/catalog/product/cache/83acc1c1c8c62159956e7c481dce536c/h/o/holographic-mirage-transparent.jpg)
Comment(s)


Trending Now

How to Bind Paper
January 29, 2019
What are the Best Laminators for Foiling?
July 10, 2018
How to Make a Wire Calendar 3 Different Ways
September 04, 2018
Everything you need to know about Foiling (with FAQs)
June 22, 2018
