Thermal Foil Troubleshooting (+ hacks & tricks to get the best transfer)
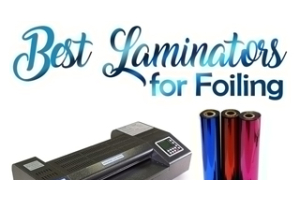
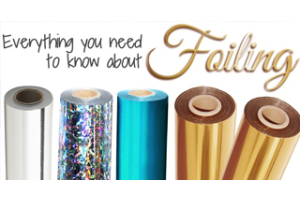
Foil fusing is an incredibly fun way to turn plain printed pages into gorgeous metallic prints, without the need for specialty foiling equipment. You just need your dry toner print, a foil roll in your choice of color, a pouch laminator, and a protective sheet called a pouch carrier. You can find all kinds of foil resources, including instructions, how to's, FAQs, and more right here in our resource center. You can also click here to shop foil.
But let's move onto the primary role of this particular post...troubleshooting. Foiling is fun and easy, but sometimes there are issues that are encountered along the way. This foil troubleshooting guide should help you fix the majority (if not all) of those foiling problems that you could potentially come across.
Foil Not Transferring:
If the foil is not transferring, there could be several things to look at to troubleshoot the problem, all of them very simple to fix.
Is your ink a dry toner? Remember, foil will not stick to anything but dry toner, so if you are not using the compatible ink, it will not transfer. Check your printer and cartridge to find out if it uses the dry toner. If not, most print and copy shops have these machines, so you may be able to order your prints from there and then pickup and foil at home/the office.
Is your paper a smooth stock? Remember, foil will not transfer onto textured paper stocks...it needs to be smooth to grab the foil properly. Texture prevents the foil from getting a solid foil in the creases.
Is your paper uncoated? Foil will not transfer well onto coated paper stocks (sometimes worded as C1S or C2S on your box of paper) as the coating prevents the ink from allowing the foil to connect properly.
Is your laminator hot enough? 300° F is the minimum recommendation that your laminator needs to reach, and hotter is better. Some paper stocks (like thicker sheets) and even some foils (like holographic and transparent foils) will need more heat to transfer properly. If your foil laminator is already at it's top heat, then try slowing down the speed. If you do not have adjustable speed or heat, then try just running it through a 2nd time. Note that it can only be heated a couple of times before the foil becomes unusable, so you may need to use a new piece of foil. And once peeled up, it may not work, so you should not peel the foil and then run it again, as it may not stick. You can usually tell when a transfer has been done well by just looking at the sheet; you can see the impression of your design in the foil.
Foil Transferring onto Page where there is no Ink:
Tool Tip: It is a good idea to have a paint or dusting brush handy to lightly dust off the page after foiling, as some speckling on your page is normal. This will help remove those speckles.
Is your Foil Laminator too hot? If you have brushed your page and the speckles are not being removed, then your laminator may be too hot (or too slow). Try lowering the temperature or increasing the speed and running a new sheet to see if that reduces the speckles.
Tracking Dots: Tracking dots are small yellow dots that are not visible to the human eye, printed on every sheet of paper printed in color. These dots can be read, and will tell where, when and who bought the printer. This is done, so if someone write a letter to someone threatening them, they will be able to track the printed letter back to that person. If you print something off your printer in color, and use a loop, you will be able to see the tracking dots. Not all, but most printers now include tracking dots. You can also Google tacking dots and printers. These dots only affects the foil fusing process if you print in rich black. So, if you buy a printer that prints tracking dots, and you need to print rich black, you will have to leave out the yellow, or you will get little foiled specs all over the sheet after you run it through the foil fuser.
Foiling Hacks, Tips, & Tricks:
Tips for success with thermal toner foiling, and tricks to ensure the best foil, every time.
Foil on your Pouch Carrier: To prevent any foil from transferring onto your pouch carrier folder sheet, always place a piece of thin scrap paper on top of your design before you foil. If your foil "bleeds" to the edge of your print, then you will always want to have a piece of scrap paper below your print. The goal is to prevent the foil from coming into contact with the carrier. Because foil can transfer onto your carrier otherwise, it is a good idea to keep several on-hand for errors like this. Luckily they are very inexpensive.
Best Ink to Use: Solid black will grab solid foils best. It is the most saturated "color", so can produce the most saturated foil finish. Plus, you won't see the ink underneath, so using a different color wouldn't make a difference. The only time you would want to use a colored ink instead is if you are using a transparent underlay foil, such as our holographic foil (which come in either a silver or transparent underlay). This would show through the foil pattern, adding the ink color hue beneath it. When using anything but black, and when using more specialty foils like transparent or holographic, your laminator will need to have extra heat. And remember, you much have a dry toner printer ink for this heat transfer foiling to work.
Ready to Shop?
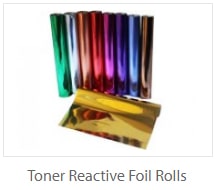
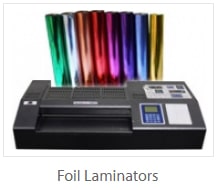
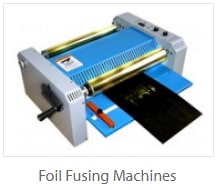
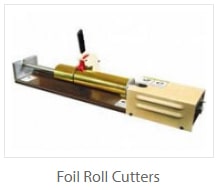
Check out our huge variety of thermal reactive toner foil, which includes hundreds of options including metallic and matte colors, holographic patterns, glittery foil, classy iridescent designs, and more. We also offer several top-quality pouch laminators that have been tested and approved for foiling, as well as formal foil fusing machines for higher volumes, and foil roll cutters to shorten the width of your rolls.


Hi! My name is Mallory and I have been in the industry since 2008. If you do the math, that is over 15 years. I have spent my time at Binding101 in many roles, including customer service, sales, e-commerce management, video production, and more! Because of this vast experience, I bring a truly expert touch to the content in our blog. widdling down complex topics to extract what our customers really want to know. As the Content and UX Manager, I act as a writer and editor for the majority of copy you will find here. When not at my computer, I love spending time binging stand-up comedy, baking, and cuddling up with my family and rescued cats and dogs...